Musings from the Threshold

Category Archives: Homemaking

Book Covers Tutorial

Making book covers is something that my family did a lot of through Eric’s and my Jr. High and High School years. We attended a small Christian school where textbooks were used over and over, and the students were required to have covers on their books to help them last longer. Most of the covers I remember from school were either made from paper bags or from heavy duty paper the school sold for that purpose.

Today I made covers for the Bibles our children got for Christmas. No paper sacks this time! I recently acquired several discarded books of wallpaper samples, and one of the projects I had in mind when I requested them was making book covers. If you’d like to acquire some wallpaper sample books, just visit the home decor department of your favorite home improvement store and ask for them to save some for you when they next get new books.

On to the cover making! If you’re nervous about cutting into pretty paper on the first try, you can always use a brown paper bag for your first try. Or you can do them all with brown paper – it has it’s own charm and I’m not knockin’ it.

Measure the height of the book and add 4-6 inches.
Measure the width of the book (both covers and spine) and add 4-6 inches.

Due to the width of the Bibles I was covering and the width of the wallpaper, I opted for adding 4 inches, 2 inches overlap on each side. If I had larger paper or smaller books, I would have chosen to have 3 inches overlap. But the 2 inches looks like it will be sturdy enough.

Cut the paper according to your measurements.

Center the book on the paper, pull the paper snug and fold over the sides.

Mark the top and bottom of the book, a smidge away from the book itself, and going up the side just a bit (click to see a larger picture if the mark is too hard to see in this one).

Now you’ll have your sides folded in and the top and bottom marked.

The step I don’t show here that I highly recommend is to go ahead and unfold the sides and use your mark to fold the top and bottom edges all the way across, being sure you fold evenly (it should square up on the sides). This will give you a helpful guide for later.

Unfold the top and bottom again and cut up to your mark at an angle.

Fold over your isoceles trapezoid (yes, I had to look that up) at the top and bottom.

Place your book back on the paper, wrap the sides over, and check to be sure you’ve measured, cut and folded correctly. The folded edge should come to just below and above the spine of the book.

The next few steps are easiest if you have a helper hold the opposite cover and the pages upright while you work on one cover at a time.

To reduce bulk, trim off a triangle from the side fold-over.

Fold over the corner as if you were wrapping a present. Note that there is space for the existing cover; this may vary according to the thickness of your book’s cover.

Now fold the flap over and tape or glue. The fold should line up with the folded-down piece on the spine. This is where folding the top and bottom all the way across helps, because you already have a crease.

Repeat this for the other corner on that side.

Repeat for the other side and you’re done!

Here are the covers I made this afternoon. I didn’t think to time it, but was a pretty quick project.

Baking Fun

Jonathan got me this wonderful mixer for Christmas. Doesn’t it remind you of the tail light of a ’60-something Chevy? I love it!

I also love that I’ve started making bread again, thanks to this strong reliable mixer and its dough hooks. I just can’t handle kneading bread, and this does the hard part while allow me to do the fun stuff. The above shot was on New Year’s Day. I was working on my “first” batch of bread while playing Apples to Apples Bible Edition with the boys.

Here’s my second batch of bread. Should’ve gotten it out a little earlier, but it is still very yummy.

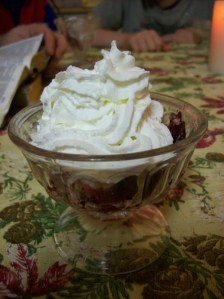
Also yesterday, I brought Katie “alongside” and she helped me make this Cranberry Crunch for dessert. She really did most of the work, and it was such fun to do it together. She even let two of her siblings go ahead of her in line for computer time because she was enjoying her time in the kitchen so much (she and Grace also helped me make quiche for supper).

Mama Stuff

Stacy at Your Sacred Calling has a great post up today about Kiddos in the Kitchen. Before you read on here, I’d love it if you’d go take a look, and be sure to read the article she links to at Like a Warm Cup of Coffee.

Done? Good stuff, wasn’t it?

The whole “Did he know what He was doing when He gave them me?” question resonates with me (and probably most moms) deeply. I’ve spent a lot of time beating myself up for my failures instead of accepting His forgiveness and moving on in HIS strength. But He keeps working on me, and it’s wonderful to know that His grace covers my mistakes, failures, impatience, etc.

On the kiddos in the kitchen business…
I have long admired and desired the parenting “model” that brings your children alongside you as you work through the day. It made sense and it sounds so lovely (two links there). But man oh man, it seems so hard to do! (Listens for the Amens) So I continue to desire to live with my children alongside me, and keep looking for ways to make that workable for me.

Here’s how my efforts have often gone in the past. I have something to do, think it would be something with which the Blessings could help. I gather them around, thinking what a fun and bonding experience this will be. 30 minutes later, the project is complete, I feel like I should be half bald from pulling my hair out, and I go to take a nap wondering, “Why do I even try?” A couple months later, I might get the courage to try again.

That probably doesn’t sound at all familiar, does it?

Well, first of all, I’ve been working lately on my heart attitude toward my Blessings. You know I don’t call them that just because I think it’s cute, don’t you? The world around me needs to know that my children are viewed as Blessings. And me? I need the reminder! Yet it is so easy to fall into viewing them as burdens instead of blessings, and I’m continually needing to ask the Lord to give me HIS heart toward my children.

Another very practical thing I’ve realized is that it just doesn’t work to bring all seven of my Blessings alongside me at the same time! The goal of bringing them alongside as I work dovetails beautifully with my (also often unrealized) goal of spending time with them one-on-one. So lately, I’ve been working on remembering to call them to me one or two at a time to help with something.

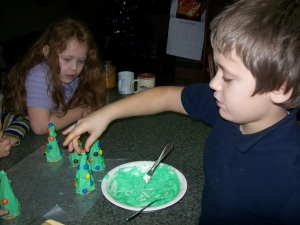
This has been a great help when it comes to special projects as well. We made gift jars for Christmas presents this year (something I plan to post about separately), and I had them help in teams of two. Each team helped me put togetehr a batch of 6 gift jars. Stephen “helped” on more than one team. Similarly, when we made edible Christmas trees, it was just two or three at a time at the counter.

So while this is a cute pictures of the Blessings and their trees,

I realized while reading the aforementioned blogs that they’re not a realistic view of how those trees happened, and I don’t want to add to anyone’s Mama complex by presenting a false view!
They happened like this:

and this:

one, two, or (at most) three Blessings at a time. Then when they were all done, time for a fun picture, then the eating!

So what I’m trying to say through all my sputtering is this: Take heart, fellow Mamas! Keep stepping along with baby steps, seeking the next thing you are to do, treasure your Blessings, and know that God’s grace covers you and them when you fail. And don’t forget that one of the greatest gifts you can give your cbildren is for them to see you honoring, respecting, and loving your man!

Making Powdered Laundry Soap

I made laundry soap this morning and decided I’d try taking pictures of my work, both for the sake of having pictures for a tutorial and for the sake of trying to hone my meager photography skills. I’ve posted more of the pictures here and would love any input on the photography aspect of my project in the comments.

And now, on to the laundry soap!

I realize some of you already make your own laundry soap, but I thought a tutorial would be fun and hopefully helpful.

Ingredients:
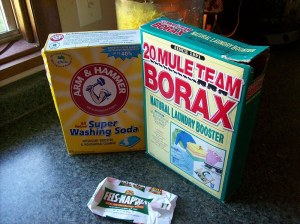
1 bar Fels Naptha (I have friends who use whatever soap is on sale, but my results increase exponentially with Fels Naptha, so anymore, I don’t do subsitutes)
1 cup washing soda
1 cup Borax

Instructions
Grate the Fels Naptha. If you have a food processor, I highly recommend using it. I use the fine grater on my Cuisinart.

I then pour the grated Fels into a bowl (isn’t it gorgeous?!),

put the chopping blade in the processor and replace the Fels.

Pulsing with the chopping blade for a bit takes it from this:

to this:

which I think has to be faster to dissolve.

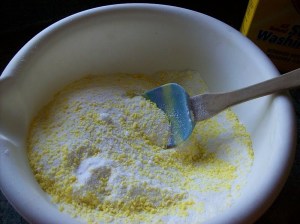
Add the borax and washing soda and mix:

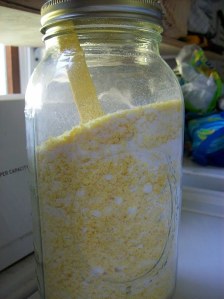
Then transfer to jar, or whatever works for you. I personally love the look of my laundry soap, so I like to keep it in a glass jar.

I made a double batch, which fits easily in a half gallon jar. It’s actually a little over 5 and half cups of soap. I use about 4t per load, so I get 65+ loads out of it. I need to use less now than I did before Jonathan installed the water softener, so if you have hard water, your loads/batch may vary.

A week for alkalizing

I noticed on Sunday afternoon that I was starting to feel awfully acidic (heartburn, general yucky feeling, etc). I tried to ignore it, but by Monday morning, I realized that I needed to focus on moving my body toward alkaline this week. And I needed to do it fast, because my beloved sis-in-law and The Cousins are coming on Friday (woohooo!!!!), and I know I’m going to be eating all sorts of fun stuff while they’re here.

Without getting into a bunch of details, I’ll try to give a brief explanation of the acid/alkaline (ph) issue. Everything you eat has the effect of causing your body to become more acidic or more alkaline. For your health, it’s best to have a ph that is slightly alkaline (around 7.2). I believe most Americans have a very acidic body ph, something that leads to all sorts of health problems. Rule of thumb – fresh fruits and vegetables are the most alkalizing, meats and processed foods are the most acidifying. I’ve done a lot of learning and have long way to go, but that’s probably the simplest way to sum it up.

I started learning about ph in the midst of my cervical cancer concern, and in conjunction with figuring out why I could no longer tolerate coffee and had constant heartburn. When I started testing my ph, it was around 5. That’s truly dreadful. With a radical change of diet for several months, I brought it up to around 7.2, and have been able to maintain that with a way of eating that seems reasonable and workable for me. But there are times when I get off track with my eating, and I realize I need to adjust course.

This past weekend is the first time that I’ve had such obvious evidence that I was off track and needed to re-stabilize my ph. Since Monday, I’ve been eating more alkalizing foods and very little of foods that acidify my body, and I am feeling much better already. By the weekend, I should be ready for a few splurges. Woot!

Perhaps the reason I’m blogging about this at all is that it is a reminder to me of some of the lessons I’ve learned in the last few years.

In general, I believe that it is important to live in moderation. As I’ve learned more about health and nutrition, I’ve sought to implement that knowledge in a way that is workable for our family and not too extreme. I’ve done this with varying degrees of success, so I’m not tooting my own horn, just sharing my perspective/goals.

Alongside a growing commitment to moderation and grace has come the realization that there are times when a less moderate, dare I say – radical, approach is appropriate. When faced with the possibility of cervical cancer, I was very willing to get extreme about my way of eating! There are other times when, usually for a temporary period, it seems appropriate to “get radical” in one way or another.

The goal for me is to be able to come back to a moderate way of life. I want to be radical in my love for my Savior all the time, and I want to walk with Him steadily, in a way that demonstrates His amazing grace.

Quite a day

Papa and Mama Byrd are staying at the lovely Traxler “Bed and Breakfast” this week while they visit. It’s a nice way for them to visit us and some dear friends at the same time. Yesterday when they were getting close to our place, their Suburban started overheating. Not a good sign! They nursed it along and got it here, then Papa and Jonathan tried a bunch of stuff to get it to stay cool. Unfortunately, it kept overheating. They wound up spending the night here last night – yay for late night games! – and having it towed in today.

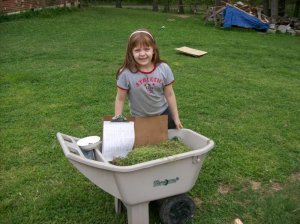
Once they left with the tow truck this morning, it was time to get busy in the garden! It’s been too wet to finish my planting, but it’s been a terrific time for the weeds to grow. Ugh. So today I had lots of weeding and planting to do. I also finally got the various areas staked and “fenced off” with string. Next year, this will be the first thing I do after tilling!

I got all of the seeds planted except the winter squash. We’ll have pie pumpkins, mini pumpkins, and butternut squash (drool…), but I wasn’t sure how big of a “hill” they needed, so today I just marked where the hills will be.

After the seeds are all in, the next thing to plant will be tomatoes and peppers. We also have some rhubarb and asparagus to plant, but since those are perennials, I’m not sure where I’ll put them.

Anyway, several hours and lots of dirt and sunshine later, I was glad to take a shower and relax a bit! Here is the evidence of my day’s labor (I didn’t take any pictures of all the dirt and sun that got on me!):